Showing posts with label Make. Show all posts

Sunday, December 23, 2012

Christmas

Christmas is kind of a bust for me this year. I've run out of time and haven't even brought the decorations up from the basement yet. I haven't done any baking. I didn't send out cards. I had plans of making some food type gifts that were scraped. I'm even taking store bought appetizers to my family's party. I'm pretty lame - although I did manage to get gifts for the 4 people/couples I buy for. It just seemed like there was no time and I wasn't in the mood. Now it's too late and I've given myself permission to just forget all of it and let it go. Maybe next year will be better.

I did manage to make two gifts. Well with some help.


I purchased a pretty lucite tray from The Container Store for $11.99. My son made a chevron liner with a monogram in Photoshop. We went to Office Depot and had it printed and then laminated for $2.50. Voila - a personalized tray. One is with red chevrons and the other has orange chevrons to coordinate with my sister's-in-laws houses. I hope they like it.

Monday, September 17, 2012

Dinosaur Planter

I made this planter for a Christmas gift last year and never blogged about it. I saw something similar on Etsy and thought, "Wow, I could make that" and saved the $25 plus shipping the person charged. I started with a dinosaur I found in the dollar bin at Target. It was kind of hard to find a dinosaur that was large enough to stick a plant. I found some on Amazon.com but didn't want to spend $25 to get a bunch of them. No single items. So I lucked out and found it at Target after much searching. I bought 3 at $2.50 each.


Cut a hole in the dinosaur's back. Also easier said than done. The plastic is thick and strong. I thought I'd use a box cutter. No dice. Knife? Exacto knife? Hand saw? Dremmel tool? No, no, no. Nothing worked. I ended up taking a smaller drill bit and drilling holes all around the spot I wanted to remove. Drill them right next to each other and then take a knife and cut the connecting plastic away and remove the cap. It worked OK. I then did take a Dremmel tool (the little spinning sand paper disk thing) and tried to smooth out the opening somewhat. It also worked OK.

After the hole is cut, paint the dinosaur your favorite color. The one I gave my brother for Christmas was painted orange. I painted the one I kept for myself blue. The last dinosaur is still intact and awaiting a transformation.

The animal is hollow inside. Stick some tin foil in the tail of the animal. You don't want a ton of water pooling in the tail and getting all gross. Fill up any cavities.

Add dirt and the plant and voila! Dinosaur planter. I've had my planted since December and it's still going strong. My brother's is also alive. I used succulents that don't require much water - just some good sunlight and a drink every now and then.


Monday, January 10, 2011

Baby Quilt in progress

I'm so excited. My older brother and sister-in-law are expecting their first child in May. I've started a baby quilt as a gift. It's a string quilt set in a diamond pattern. I used all fabrics from my stash. I'm so glad to use up all my brights! I even have enough fabric for the back in my stash. Stash busting, yea! (Although it hardly makes a dent. Still every little bit helps.) I still need to make more blocks and sew the top together - I took a break when my son was home from college over the holidays. I lost my sewing room as it reverted back to his bedroom. Now that he is back at school I can set up my machine and get going again. I thought you might like to see the progress. I've got a March 1 deadline to get the top done as it then gets sent out to be machine quilted. Sounds like enough time, but I'm notorious for 1/2 finishing quilting projects. This is a baby quilt - not a toddler quilt!


Tuesday, October 26, 2010

Fall Decorating - Yes Please!

A week or so ago I wrote that I just don't get into seasonal / fall / Halloween decorating. I also don't decorate for Valentine's day, St. Patrick's day or the 4th of July. Purchasing a new scented candle is my only nod to seasonal changes. I do decorate for Christmas / Winter and enjoy that. Anyway. If I was the type to decorate for fall this is how I would do it.


Nice and modern. From Happy Mundane via ReadyMade.com.


Wednesday, September 22, 2010

Silhouette Pillows

For a prior Christmas I made my dachshund owning and loving Brother and Sister-in-law and Father and Step-Mother a set of these pillows. I saw them in a magazine and they were $95 for the set (plus tax and shipping!). I new I could make them way cheaper. I found a picture, enlarged it, and printed it out. I traced it onto fusible web and fused it onto the felt, cut it out and fused it onto pillows I made. I probably spent $15 for the set (mostly for the pillow forms). They were a BIG hit. I trying to come up with an idea for this Christmas that will be so well received.


Wednesday, August 25, 2010

Felt Tissue Holder

I'm one of those women who cry at just about anything - happy, sad, sentimental, etc. I'm sensitive and feel things deeply. This is not a trait I'm really happy having. The sensitive thing yes - the crying no. I always carry a hanky but it doesn't stand up to my waterworks and is soon useless. So I carry a little package of tissues with me always. But they are boring looking, so I made this little holder for my purse.


I liked it so much I made a second one for my tote bag!


They are just some felt, pinking scissors, a sewing machine (although you could hand stitch it) and a little hot glue to hold the heart on. I think they look really cute! Oh it cost me $1.00 for two new packs of tissues, I had the felt and glue on hand.


Tuesday, August 17, 2010

Business Card Holder


I have these cute calling cards that I had made up. They come in very handy when meeting new people and giving them my contact information. Or when I'm talking about my blog to someone and they want to go check it out. My problem has been that I just had them shoved into my wallet. When I would dig them out, all my other wallet items were displayed. I knew I could do better.

I saw a couple tutorials on how to make business card holders here and here. I used the tutorials as a jumping off point and added a 3rd fabric for more color and ended up with this:


I was worried that the cards would fall out and spill all over my purse. Or that I would need some velcro to hold it closed. Although a velcro dot might still be useful. But the fit is snug and they aren't going anywhere. The project was simple and quick. It took me longer to get my sewing stuff out and set up on the dining room table then it did to sew the holder! I just love that fabric color combination.

The project was basically free. The fabrics were scraps from my stash and the interfacing from another project. I'm very pleased with how it turned out!

Linking up to some of these great parties!

Tuesday, June 22, 2010

Chicago Craft Social


I attended my first Chicago Craft Social Friday evening. It was TONS of fun. I met new people, learned new crafts and had some yummy snacks. There were 20 tables set up with different craft projects or demonstrations. You completed a project then moved to another table that interested you. Some of the projects I worked on were: T-shirt bag, making my own button/magnet, making seedling pots from newspaper, Origami flower balls and Collograph print making. There were many more that sounded fun, but I ran out of time. 3 hours went by so fast!

My tip for my next social: arrive early and go to the table you most want to visit first (duh). I started with the origami flowers and it took up much more time than expected (and I didn't even complete the project although I took supplies home to complete the top 1/2 and it's really cute). And then I couldn't get a seat at the polymer clay table, which I've never done. I really wanted to try the Polyform Clay Mokume Madness project that they were doing. Click on the picture to enlarge it and see the very pretty details.

I even  wanted to do the clay craft more so once I won a door prize (!!) of Polyform Clay products. I was so excited! Since I wasn't able to do the craft at the Social, I talked with the leader and got a copy of the instructions so I can try to make the jewelry at home. Their website also has tons of project ideas, like a mint tin covered with the same Mokume technique. Great for business cards and the like. It looks really cool.

Most projects I tried were super simple and required basic supplies. Of course I'll be sharing some with you over the next few weeks!

I'd show you some pictures, but I FORGOT MY CAMERA. Some blogger I am. I've resigned myself to carrying a large, heave purse with my camera (my phone camera stinks), swatches, umbrella, sunglasses, wallet, cell phone, card case, etc. in it at all times. I can't tell you the number of times in the last 2 weeks I've reached for my camera or cards and didn't have them with me. Agh! In fact I have a prototype purse, aka a purse that is now falling apart that I got at a thrift store, that is the "perfect" purse for me. All I need to do is figure out how to construct a new one! I'll be lugging all my junk while being fashionable and organized.

But back to the Craft Social. If you are in the Chicagoland area (the event was held in my hometown of Evanston) come on out next time. You can sign up on their website for emails and details on the next one. You'll have a great time and learn new stuff! Promise.


Wednesday, June 9, 2010

It's Craft Time - Burlap and Freezer Paper Stencil Coasters


This is another project I made weeks ago when my friend Alison was visiting. She did the sewing and I did the stenciling.

First make sure when you purchase burlap that it is cut on the straight of grain. With mine, the lady at Joanns just cut it and I wasn't paying attention. When I brought it home and trued it up I lost almost a 1/3 yard of fabric.

Cut a burlap square for each coaster you want to make. Mine are 5" square. Cut one square of craft felt 1/4" smaller than the burlap square.  Use pinking sheers and cut the edges so they have a nicer appearance. Center a piece of felt on a burlap square. Stitch 1/8"  in  from the edge of the felt all the way around the coaster. Hand sew a running stitch using colored floss on your sewn line. I lightly frayed the edges of my coaster by pulling out a burlap thread or two on each side.

For the stencil, find an image you like. My experiment piece was a retro starburst flower type of design. It looked great but took me longer to cut out with an exacto knife than I was willing to spend. Once I had the freezer paper stencil process down I used an image of a bird that was much quicker to cut out with a pair of scissors. Use your computer software to size your picture to what you need. I used Photoshop, but you can use whatever drawing / painting program you have and are comfortable with. Print the picture and hold it up to the coaster to double check your size.

Transfer the picture to the dull side of your freezer paper. I found it easiest to tape my picture to my window put up a piece of freezer paper with the shiny side toward the window and trace on the dull side. Trace as many images as you have coasters. Each stencil can only be used once. Make sure you leave plenty of room around each image as you will be cutting out the image and need the "frame" around it left intact.

Iron the cut out stencil (shiny side down) onto the coaster. It only takes a second or two to adhere with a hot iron. You can also eye ball and iron on any pieces which were not attached to your stencil. I had the piece between the birds legs and the branch to iron down. Paint within the stencil with your choice of regular craft paint. Paint with a pouncing motion instead of a sweeping motion. Let the paint dry for 5 minutes or so and peel off the freezer paper stencil. Let the paint dry completely before using the coaster.

With the bird coasters, I stenciled first and Alison sewed when they were done. With my second set of coasters, Alison had already sewn the coaster and then I stenciled. Both sequences worked fine.


Linking up to these wonderful parties!


Tuesday, June 1, 2010

Barcode Art

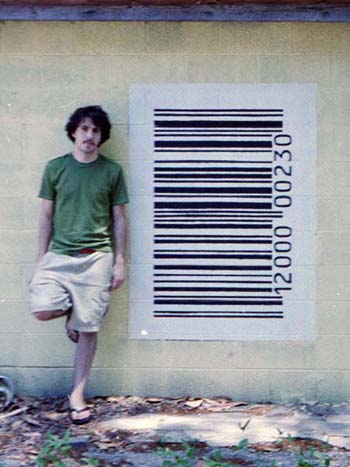
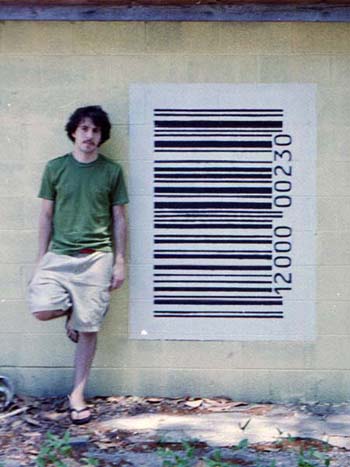
I've become mildly obsessed with Barcode Art. I don't know what sparked the obsession, I just know I want a print in my condo. My problem? Cost. I'm super cheap. Do you think I could make it? I'm thinking it's just a lot of painters tape for the stripes and a number stencil on a canvas. I think under $20 bucks total cost with a 40% off coupon for the canvas. What do you think?

All Modern.com wall sticker art for $90.


I just love the barcode graffiti at Senses Lost.

Barcode protest art shown at Ad Land.


the barcode printer: free barcode generator

Barcodes Inc has an online generator where you can change the size and the output in order to create your design.


You can barcode yourself at Barcodeart.com. The barcode above contains data about my age, country, height and weight. At the site you can purchase your barcode on fun things like tattoos and dog tags. You can also get a custom painting for $350.

I'm adding the project to my lengthy craft to-do list. If you make one, show me! I'd love to hear how it went.


Wednesday, May 12, 2010

It's Craft Time - Kitchen Erase Board

I've been wanting either a chalkboard or a white erase board in my kitchen. I thought the chalkboard would be dusty and worried about grease and I thought standard white erase boards are ugly. What to do, what to do. Why I made my own dry erase board, of course! It was easy peasy and pretty thrifty.


I started with a beautiful picture in a gorgeous frame that for some unexplained reason was drastically clearanced at Joann Fabrics to the princely sum of $9.99 (and of course I then used my 40% off coupon). It was very pretty with multiple levels of mat adding a lot of depth and a fantastic gold and silver with a little black flecked wide frame. For my purposes I only cared about the frame, and it was nice and big and just the perfect size for my 24 inches of  free wall space in my kitchen. I was a little worried. I had seen similar projects in blogland and they always use frames with glass and mine was plastic. Turned out my dry erase markers work just fine on plastic. (Yes, you just write on the glass/plastic. Like magic - it's a dry erase board!)


I picked out some great fabric at a quilt store. I wanted something with a subtle pattern but was still neutral enough to fit into my kitchen. Most importantly it had to be easy to read what was written on the front. I thought about burlap, but wanted something different. I bought more fabric than I needed for the project (hmmm.... Freudian slip?) and don't remember what the fabric cost - but lets just call it $4 for the fabric. It's in the ballpark. Oh! Don't forget to iron your fabric.


So now the easy part. I took the paper on the back of the frame off and pried up the little tabs that held the one piece picture and mat in. I then wrapped the cardboard back of the picture with fabric. Except like a dork I first wrapped the picture side and couldn't figure out how I would stop the pictures from showing through the fabric. Just a little brain fog. I flipped the picture over and wrapped the BACK cardboard side with fabric and taped it on the FRONT of the picture. Much better. I used just regular packing tape, but duct tape would also work if it was handy. You just need it to hold until you get the frame reassembled.


We're now on the kitchen floor. I move around a lot when crafting since space is limited. Wash the plastic (or glass) and put the picture back together.


Ta-da! The fabric print is really subtle in these pictures. It shows up a bit more in person. It looks beautiful with my milk chocolate walls, stainless steel appliances and cherry and black cabinets. Too bad I can't get that into the picture. My kitchen is small and my back was up against the opposite wall as I took this picture.


Total cost $10-ish (I'm getting better at remembering to take pictures. Now I need to remember to save my receipts). Except for the fabric shopping (which was really fun) I think it took me longer to iron the fabric the it did to make the project -- 15 minutes tops even with my little taping mix-up.


Wednesday, April 28, 2010

It's Craft Time - Architectural Letter Name


My friend was talking about her friend and how she received her last name in framed architectural letters as a gift. Both friends just loved it and thought it was the neatest thing. I told friend 1 (OK, It's Alison. Again. My Creative Cohort.) that I could easily make one for her. You see, she was going to spend big $$ and order one from where the other friend had received hers. I can create that project in under $10 dollars, Bob. And off I went. (In case you can't tell, the letters spell out BOWMAN).

I first started at my store of choice, Dollar Tree. There I picked up 6 carved bronze-ish 4"x6" frames for yes, you guessed it $6. The bronze-ish color coordinates beautifully with other accents in Alison's bedroom where these are to be hung. No need to even paint them! And unless you look really hard, you can't tell these are cheap plastic frames. Nobody will be looking that closely at the frames, they will be awestruck by the architectural letters inside.

Next I scoured the interweb for architectural letters. They were easy to find, but watch for copyrights. Larger file sizes were better for increasing in size to 4"x6" than small images which became out of focus and blurry. So in Photoshop I cropped and enlarged the letter to 4"x6".

At first I had them in black and white. I thought the graphic nature of the letter would look good that way. It was also a way to make them all look more cohesive. They looked awful in the bronze-ish frame. I was crushed. What to do, what to do. After a little Google action I had the answer. Change the letter from black and white to a sepia tone. I had no idea how to do this (I was please I managed to get them black and white). This is where my friend Google came in with this awesome tutorial here. Well "here" should be a clickable link to the wonderful, simple tutorial I used. But I can no longer find my link so you will also have to Google it.


Here you can see the difference. The black and white is on the left and the sepia toned one is on the right. The difference is kind of subtle but made a world of difference in the frames.

So the project was easy and fairly quick. Find the letter (took the longest - I couldn't find an "N" that I liked), open the file in Photoshop (I'm sure you could use some other software, this is just what I had) and size and crop to 4"x6". Why 4"x6"? Because that is the size of the large stash of photo paper I had on hand. (Watch Staples for wonderful deals. I think I paid $1 (after rebate) for each package of 100 sheets). Change to sepia tone, print, insert in frame. I think it probably took 2 hours total, including my Google time.

Project cost was $6.60 for the frames and $.06 for the paper. So for $6.66 I was able to create a personalized gift for a dear friend and save her big $$. If any of my other dear friends (Valerie) wants one just let me know.

Linking up to these great party's.


Tuesday, April 27, 2010

Fabricaholic

Hello. My name is Kat and I'm a fabricaholic.

It's been almost 2 weeks since my last fabric purchase. I was tempted today and even went into a fabric store. It was so hard. The textures, the colors, the fabrics! I was overcome with the need n.e.e.d to purchase, even though I knew it wouldn't be good for me.

I told myself I was only going in for some fusible web for my son's quilt project and had a coupon. I was lying to myself. I went in for that, yes, but also because I knew I would be around fabric.

I was a good girl and only purchased my fusible web (even resisted the magazines) But I need some serious help!

Do you have trouble in fabric or craft stores?

Wednesday, April 14, 2010

It's Craft Time - Twine and PVC Pipe Napkin Ring


Ah, the twinification of things continue. I made these handsome napkin rings out of jute twine, a 1.25" x 2.25" piece of PVC pipe (it was some sort of connector so I didn't have to cut anything), hot glue, a button frame, and a scrap of fabric. They are the same diameter as toilet paper tubes but mine are longer and thicker than other napkin rings I've seen. I wanted a beefier ring for a more modern appearance. I figure they cost about $1 each to make.

jute twine cost $2.24 a ball (will only need one)
PVC connectors were $.55 each
hot glue on hand
button cover frames on clearance down to $.25 for 3
small scrap of fabric on hand

I could have made them even cheaper if I used a toilet paper roll instead of the PVC pipe. I think I've spoken about how my china cabinet is crammed packed with linens. I was afraid the TP tube would get smushed. And these aren't hard to make, but I wasn't going to make them twice because one was squashed. It took about 15 minutes to make one. And another 15 minutes to figure out the best way to get a scrap of fabric in the glued on frame and looking nice (make a template of the frame ... ah ha!)

Directions are simple. Put a dollop of hot glue on the inside of the ring. Wrap the twine around a couple times in the glue so it sticks. I found it helpful if I had a long tail sticking outside of the tube and held it tightly so that the twine stuck into the glue without me having to touch it and burn my fingers. I then cut the tail off inside the tube when the glue cooled. Continue wrapping and wrapping, keeping the twine in neat lines and from overlapping. Push the twine together every so often so it's tightly wrapped. I also found it helpful to not have an extremely long piece of twine to wrap with. It was quicker to wrap a shorter length and glue it every so often then continue to pull through a long piece. When the tube was completely wrapped I glued down the end and left a tail again to pull the twine tight. I cut the tail off inside the tube when the glue was cool.

I then glued the small frame to the tube. I made a template of the frame and cut a small piece of fabric and put it in from the front. This way the fabric can be changed out as I like. I can even put a small paper monogram inside.

I have one down and 9 more to go. This is definitely an in front of the TV project. My only problem is that I don't really watch TV (or own a TV for that matter). So maybe it will be an in the morning sipping my coffee in my bathrobe type of project.

Oh, one last thing. Don't use hot glue on your brand new, very cute, vinyl tablecloth. Bad things happen. Why do I always use newspaper after the fact instead of before?!

What have you wrapped in twine?

Linking up to these wonderful blog parties. Come check out the creativity and join in the fun!